-
LLM Evaluation: Stop AI Hallucinations with a Reliability Stack
LLMs are impressive—until they confidently say something wrong. If you’ve built a chatbot, a support assistant, a RAG search experience, or an “agent” that takes actions, you’ve already met the…
-
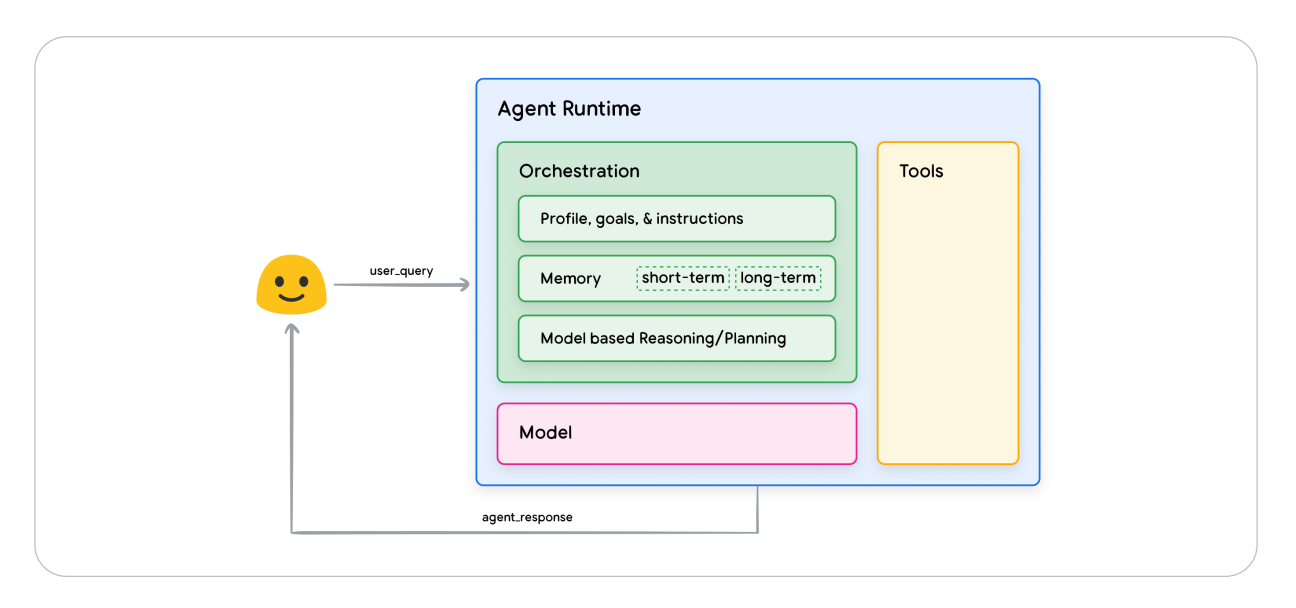
Why Agent Memory Is the Next Big AI Trend (And Why Long Context Isn’t Enough)
Agent memory is emerging as the missing layer for reliable AI agents. Learn why long context windows are not enough and how memory capture, compression, retrieval, and consolidation work.
-
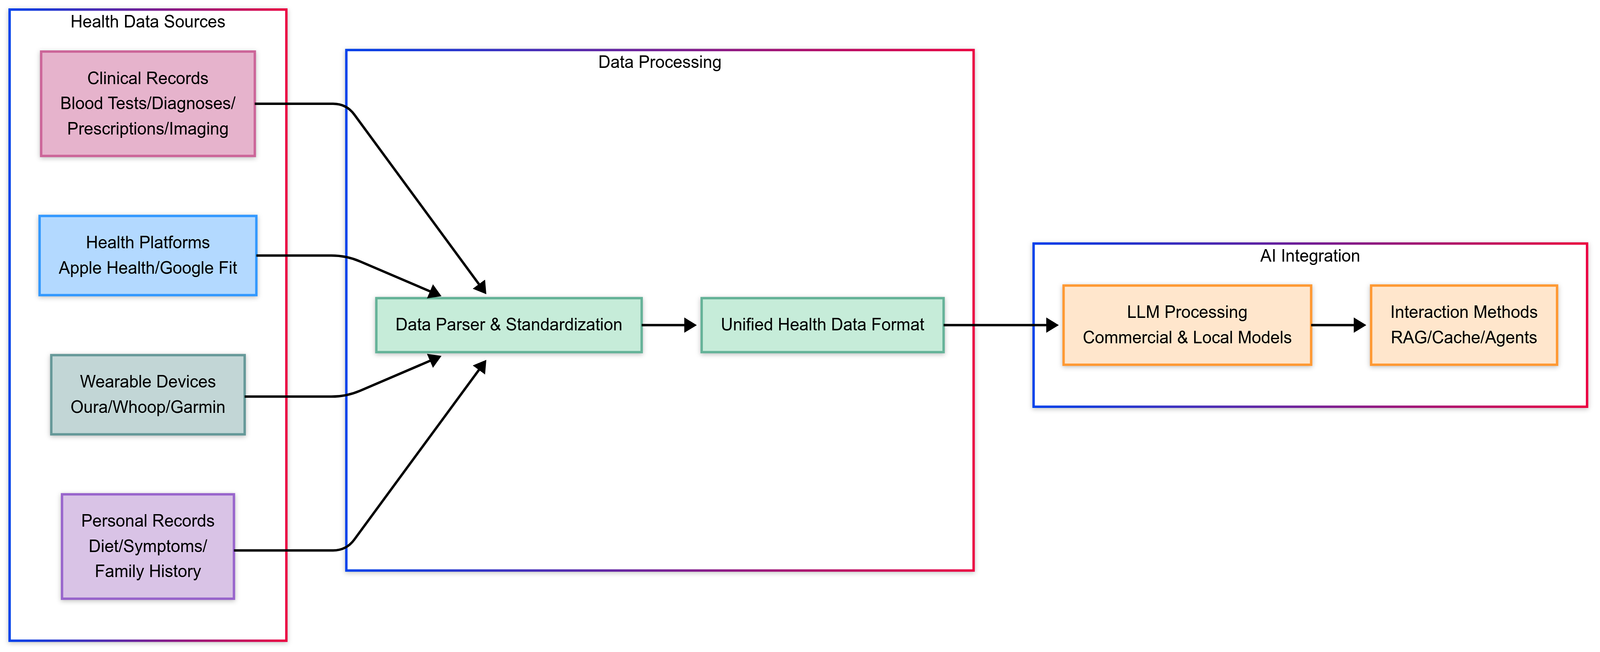
Build Your Own and Free AI Health Assistant, Personalized Healthcare
TL;DR Build Your Own Free is mostly about making agent behavior predictable and auditable. Make tools safe: schemas, validation, retries/timeouts, and idempotency. Ground answers with retrieval (RAG) and measure reliability…
-

How to Install and Run Virtuoso-Medium-v2 Locally: A Step-by-Step Guide
TL;DR Virtuoso-Medium-V2 is mostly about making agent behavior predictable and auditable. Make tools safe: schemas, validation, retries/timeouts, and idempotency. Ground answers with retrieval (RAG) and measure reliability with evals. Add…
-
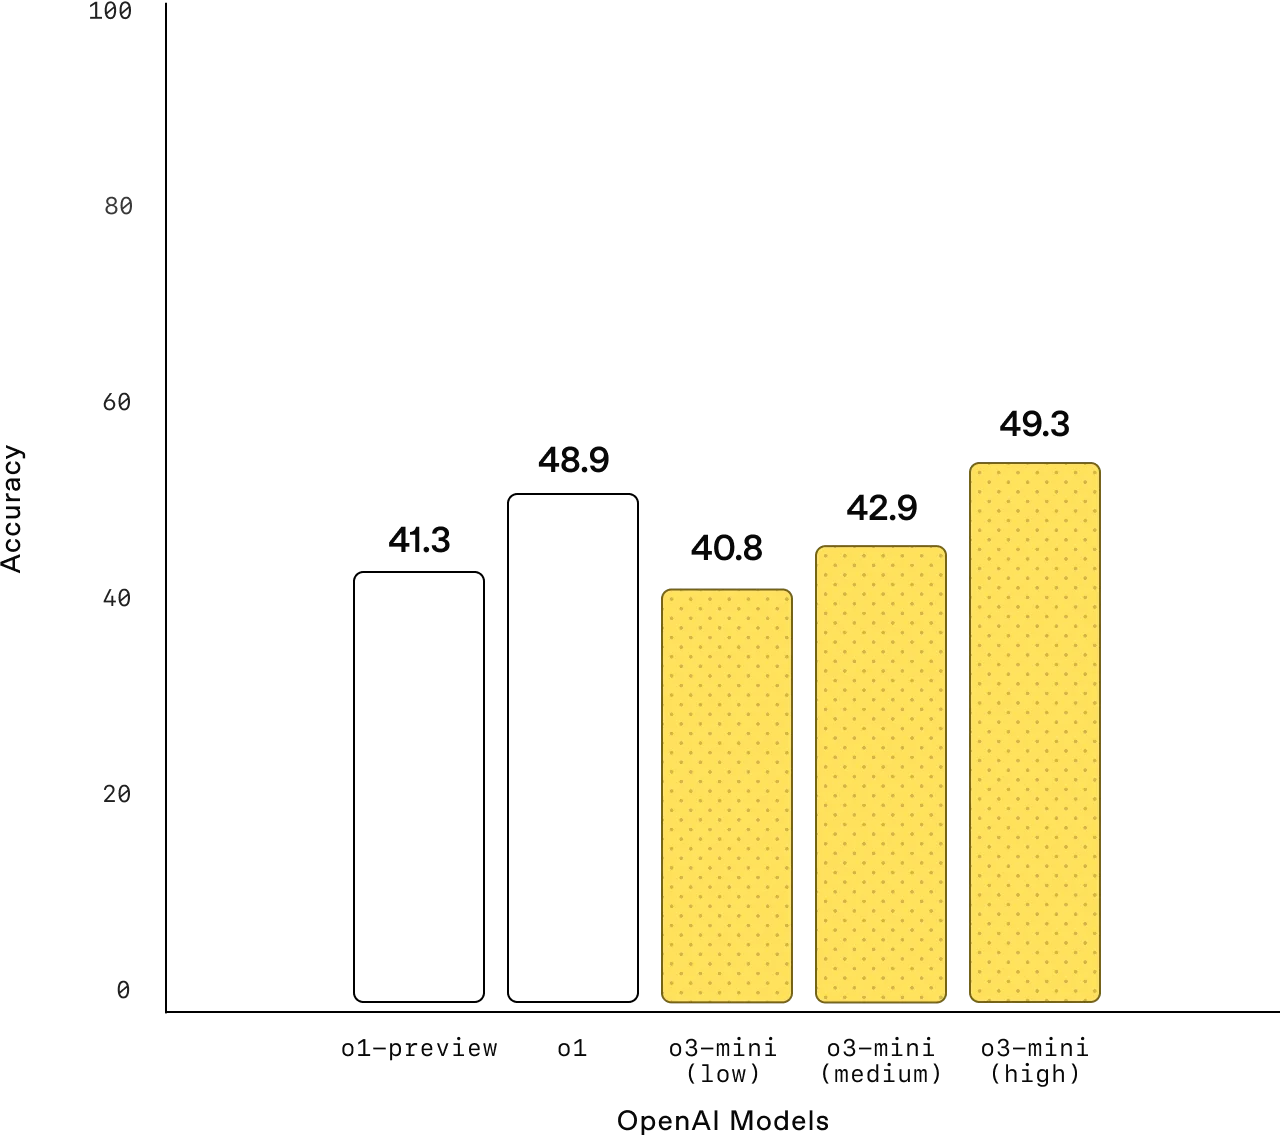
OpenAI o3-mini: Powerful, Fast, and Cost-Efficient for STEM Reasoning
TL;DR Openai O3-Mini is mostly about making agent behavior predictable and auditable. Make tools safe: schemas, validation, retries/timeouts, and idempotency. Ground answers with retrieval (RAG) and measure reliability with evals.…
-
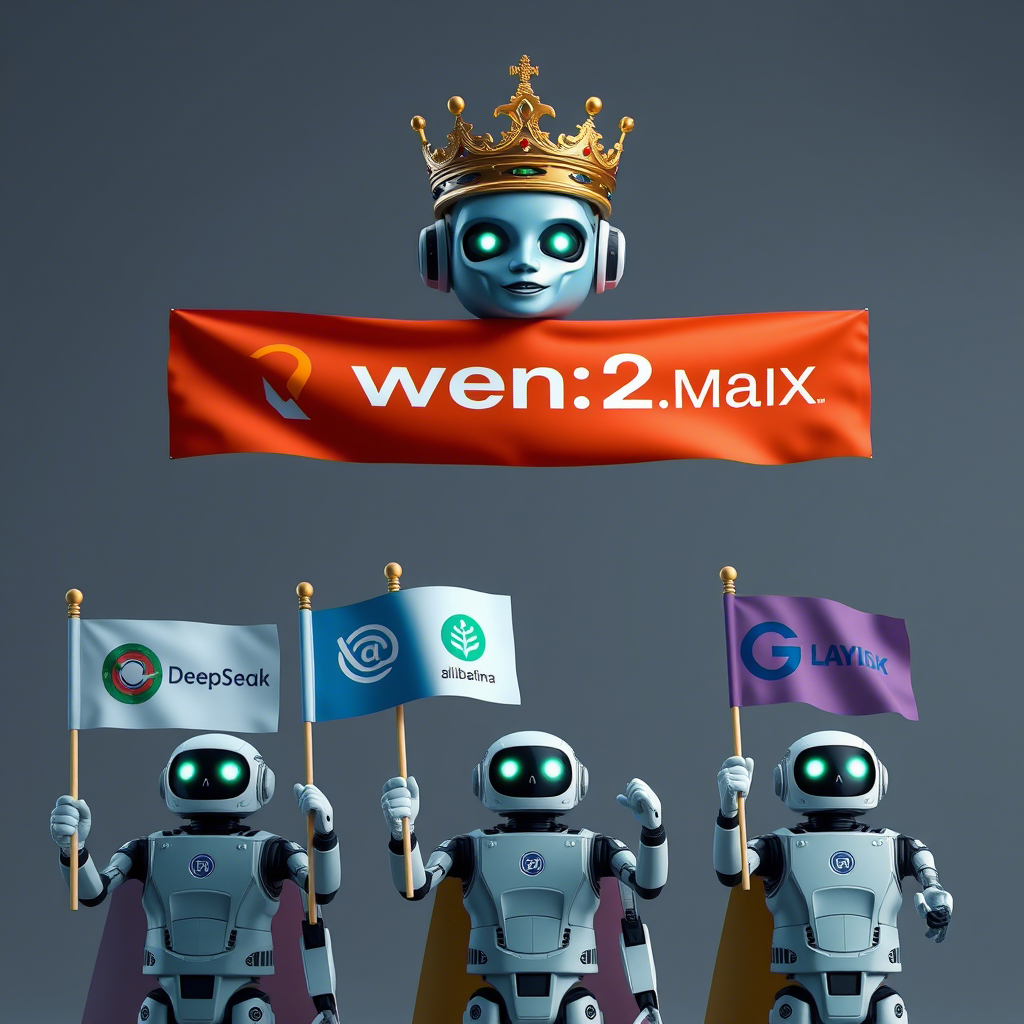
Qwen2.5-Max: Alibaba’s New AI Model Outperforms DeepSeek, GPT-4o, and Claude Sonnet
TL;DR Qwen2.5-Max is mostly about making agent behavior predictable and auditable. Make tools safe: schemas, validation, retries/timeouts, and idempotency. Ground answers with retrieval (RAG) and measure reliability with evals. Add…
-
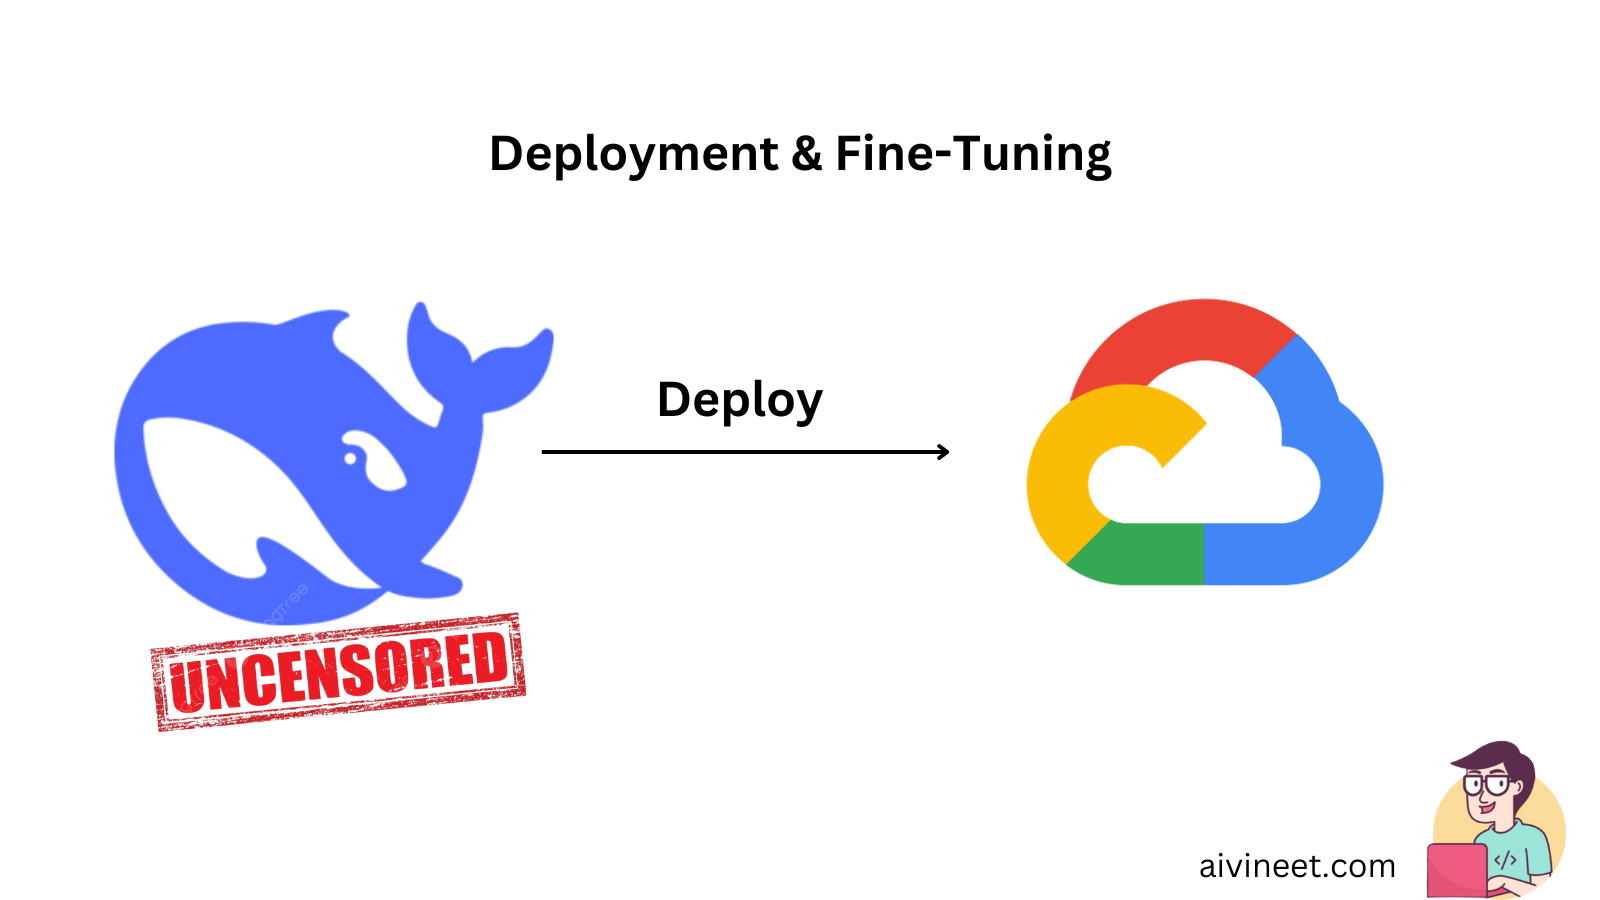
Deploy an uncensored DeepSeek R1 model on Google Cloud Run
TL;DR Deploy Uncensored Deepseek Model is mostly about making agent behavior predictable and auditable. Make tools safe: schemas, validation, retries/timeouts, and idempotency. Ground answers with retrieval (RAG) and measure reliability with…
-
AI Agents by Google: Revolutionizing AI with Reasoning and Tools
TL;DR Ai Agents By Google is mostly about making agent behavior predictable and auditable. Make tools safe: schemas, validation, retries/timeouts, and idempotency. Ground answers with retrieval (RAG) and measure reliability…
-
Free, Open Source Realtime 3D Model: SPAR3D by Stability AI
TL;DR Realtime 3D Model is mostly about making agent behavior predictable and auditable. Make tools safe: schemas, validation, retries/timeouts, and idempotency. Ground answers with retrieval (RAG) and measure reliability with…
-
LLM for Vehicles: Small Language Models for Vehicles for In-Car
TL;DR Llm For Vehicles is mostly about making agent behavior predictable and auditable. Make tools safe: schemas, validation, retries/timeouts, and idempotency. Ground answers with retrieval (RAG) and measure reliability with…