-

Never Start From Scratch: Persistent Browser Sessions for AI Agents
TL;DR Persistent Browser Session For Ai is mostly about making agent behavior predictable and auditable. Make tools safe: schemas, validation, retries/timeouts, and idempotency. Ground answers with retrieval (RAG) and measure…
-
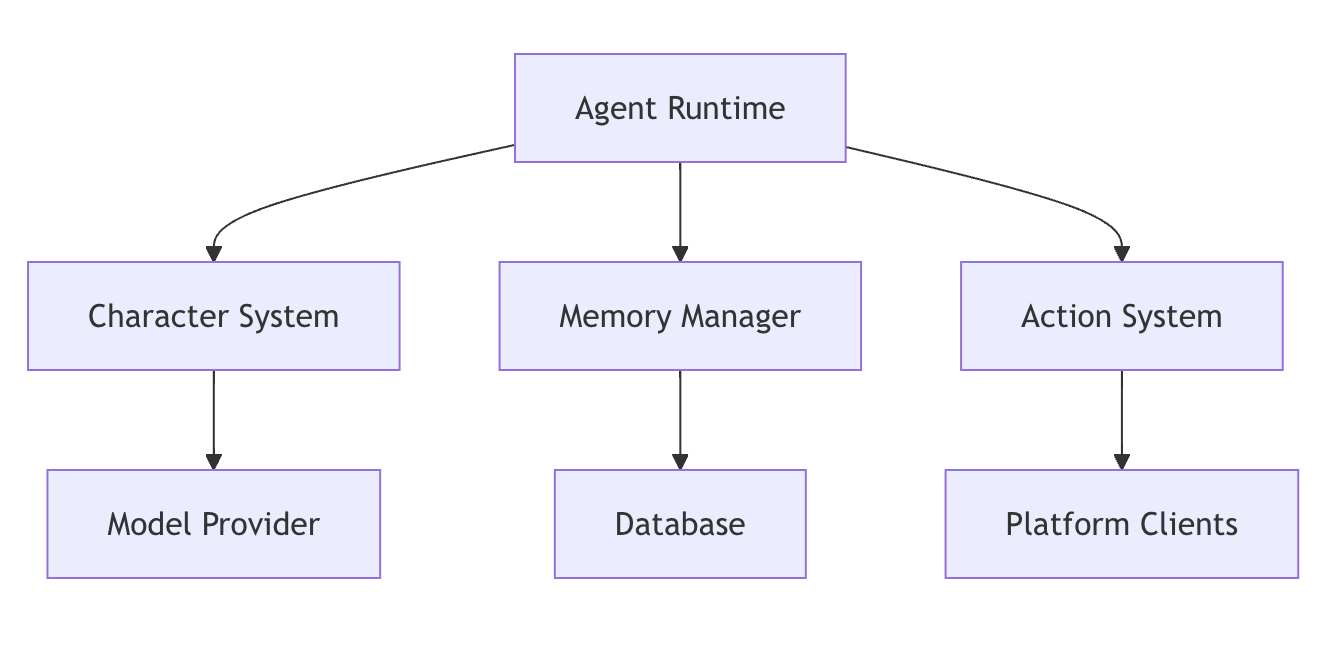
How to add custom actions and skills in Eliza AI?
TL;DR Add Actions And Skills In Eliza is mostly about making agent behavior predictable and auditable. Make tools safe: schemas, validation, retries/timeouts, and idempotency. Ground answers with retrieval (RAG) and…