-

Simile Raises $100M to Simulate Human Behavior — Why This Could Be the Missing Layer for AI Agents
Simile $100M human behavior simulation is one of the most interesting “infrastructure bets” in the agent era. Joon Sung Park introduced Simile as a platform for simulating human behavior, and…
-
Why Agent Memory Is the Next Big AI Trend (And Why Long Context Isn’t Enough)
Agent memory is emerging as the missing layer for reliable AI agents. Learn why long context windows are not enough and how memory capture, compression, retrieval, and consolidation work.
-

OpenManus: FULLY FREE Manus Alternative
TL;DR Free Manus is mostly about making agent behavior predictable and auditable. Make tools safe: schemas, validation, retries/timeouts, and idempotency. Ground answers with retrieval (RAG) and measure reliability with evals.…
-

Never Start From Scratch: Persistent Browser Sessions for AI Agents
TL;DR Persistent Browser Session For Ai is mostly about making agent behavior predictable and auditable. Make tools safe: schemas, validation, retries/timeouts, and idempotency. Ground answers with retrieval (RAG) and measure…
-
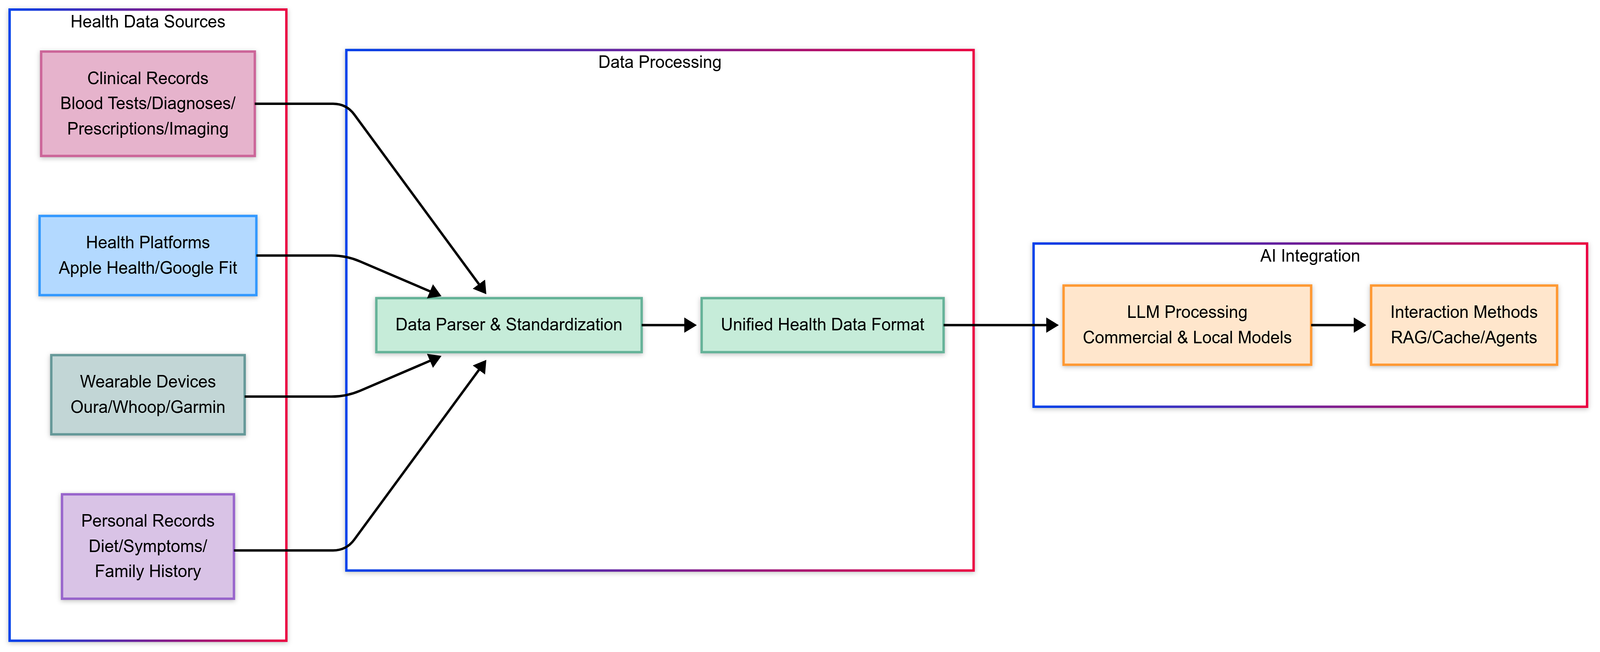
Build Your Own and Free AI Health Assistant, Personalized Healthcare
TL;DR Build Your Own Free is mostly about making agent behavior predictable and auditable. Make tools safe: schemas, validation, retries/timeouts, and idempotency. Ground answers with retrieval (RAG) and measure reliability…
-
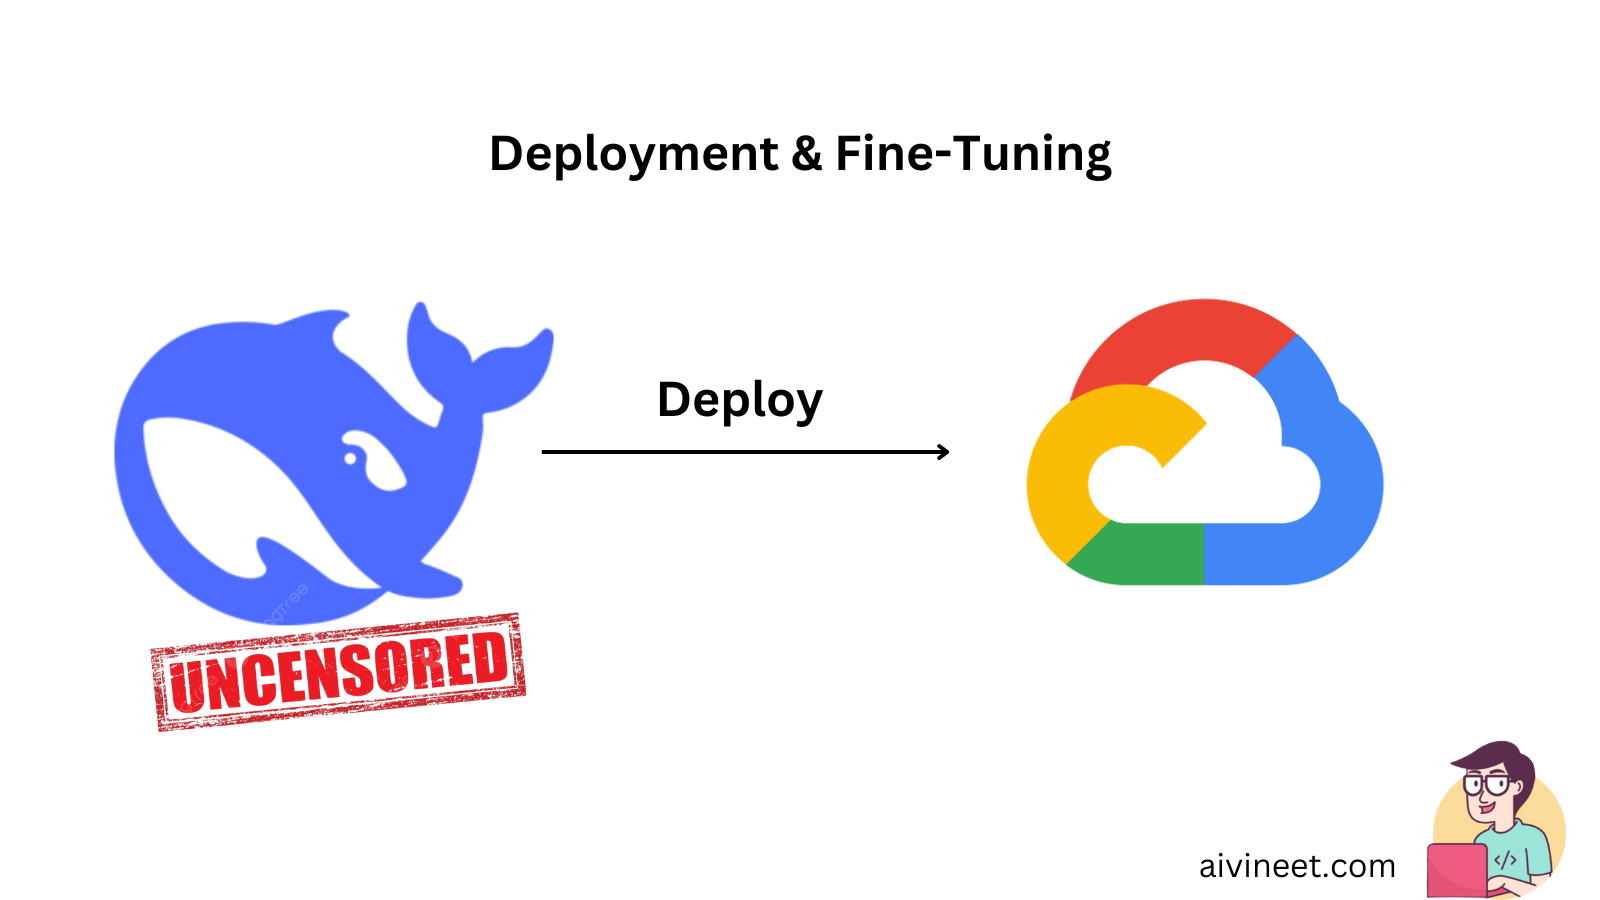
Deploy an uncensored DeepSeek R1 model on Google Cloud Run
TL;DR Deploy Uncensored Deepseek Model is mostly about making agent behavior predictable and auditable. Make tools safe: schemas, validation, retries/timeouts, and idempotency. Ground answers with retrieval (RAG) and measure reliability with…
-
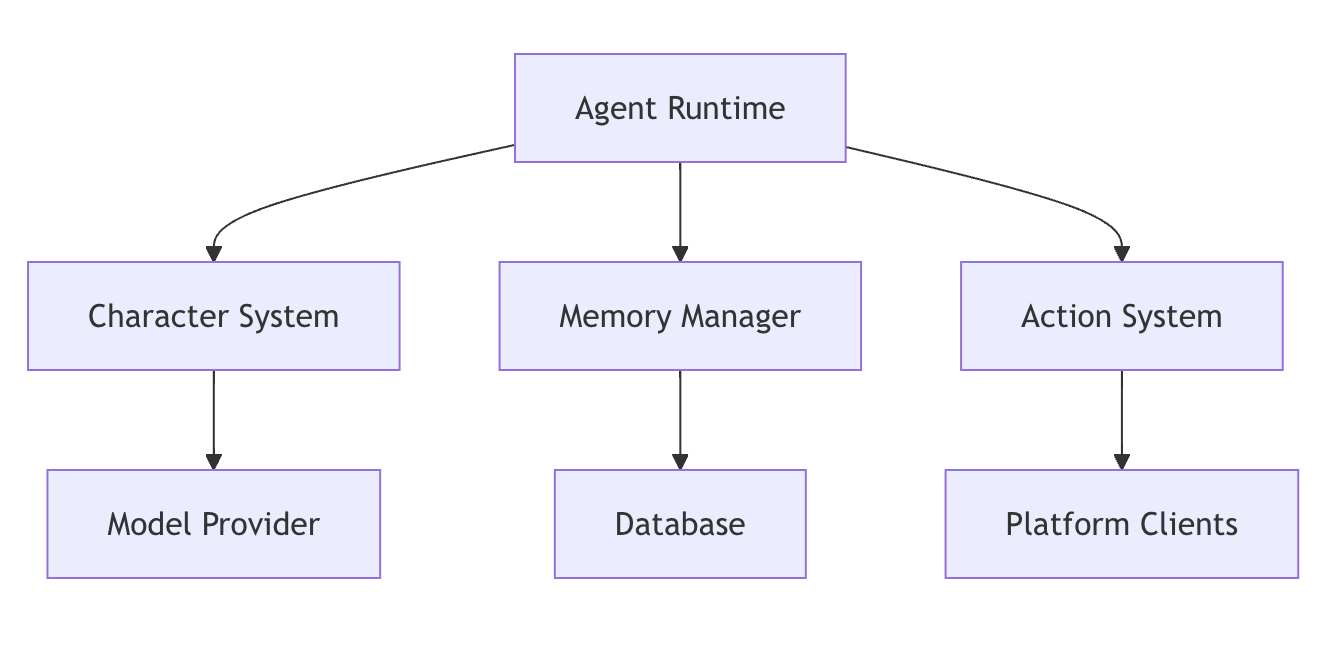
How to add custom actions and skills in Eliza AI?
TL;DR Add Actions And Skills In Eliza is mostly about making agent behavior predictable and auditable. Make tools safe: schemas, validation, retries/timeouts, and idempotency. Ground answers with retrieval (RAG) and…
-
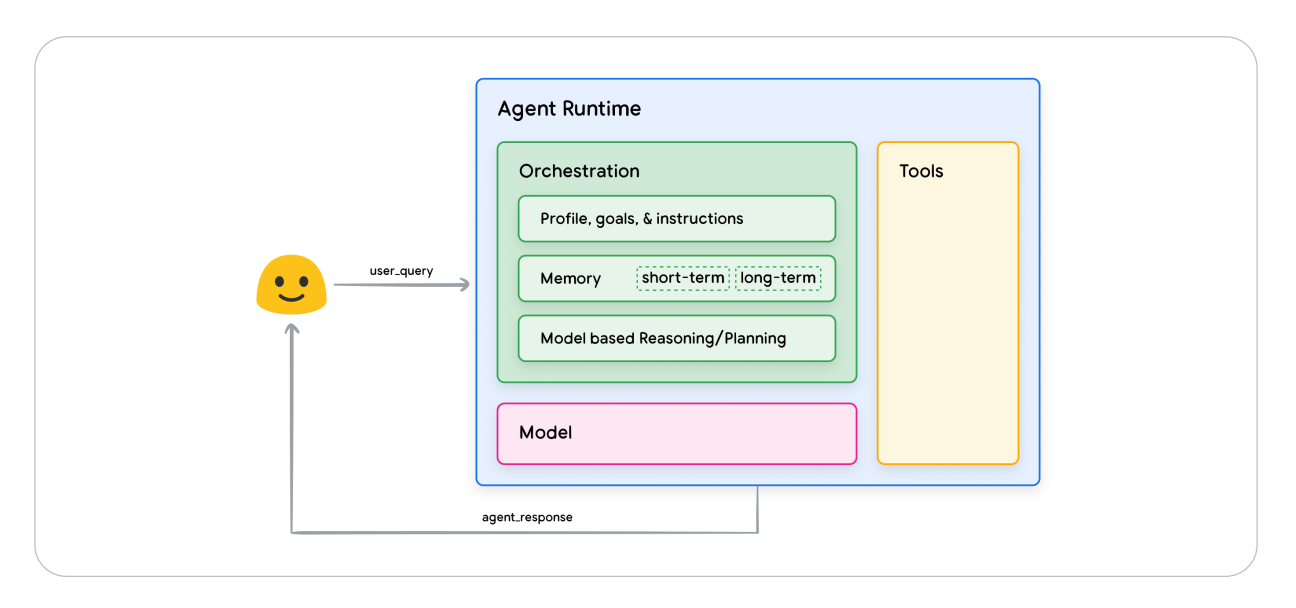
AI Agents by Google: Revolutionizing AI with Reasoning and Tools
TL;DR Ai Agents By Google is mostly about making agent behavior predictable and auditable. Make tools safe: schemas, validation, retries/timeouts, and idempotency. Ground answers with retrieval (RAG) and measure reliability…